
This form of authentication is useful when connecting to SharePoint Online without using user credentials. Instead an application is registered in Microsoft Entra ID and the Cyturus Application Suite connects to SharePoint through it.
Much of the following was derived from official Microsoft documentation, and clarified for use with the Cyturus application. The original document information can be found here:
https://learn.microsoft.com/en-us/entra/identity-platform/quickstart-register-app
And here under the Creating an Entra application using the Entra Portal heading:
https://docs.microsoft.com/en-us/sharepoint/dev/solution-guidance/security-apponly-azuread
It should be noted that connections to SharePoint Online sites existing in a GCC or GCC High (Government Cloud) environments are available, but require a slightly different configuration. This below solution works with SharePoint Online in either the Commercial Cloud or GCC/GCC High environment. In section #2 below please note the "Commercial Cloud" or "GCC/GCC High" subsections for proper configuration.
Beware! The application permissions configured in this guide will give the Cyturus Application Suite access to all SharePoint sites and lists within the tenant. Care must be taken to ensure that the application's details and certificate are not shared with any unauthorized parties.
See the below note for more information about scoping access to specific SharePoint sites.
Note: A common question we get is if it is possible to grant permissions to specific Site collections only instead of all Sites. It is possible by selecting the option "Sites.Selected" in Microsoft Entra ID Application Permissions (see further in the below setup steps); note that this option requires additional manual configuration via POST to specific endpoints via scripting or third party tools. For more details see this article:
And the update to the above here:
This link above includes a video that explain the use of the "Sites.Selected"
Important: a self-signed certificate must be created and the application must be registered in Microsoft Entra ID before the repository connection in the Cyturus Application Suite can be configured.
To configure this type of authentication, select the SharePoint option in the Repository Configuration:
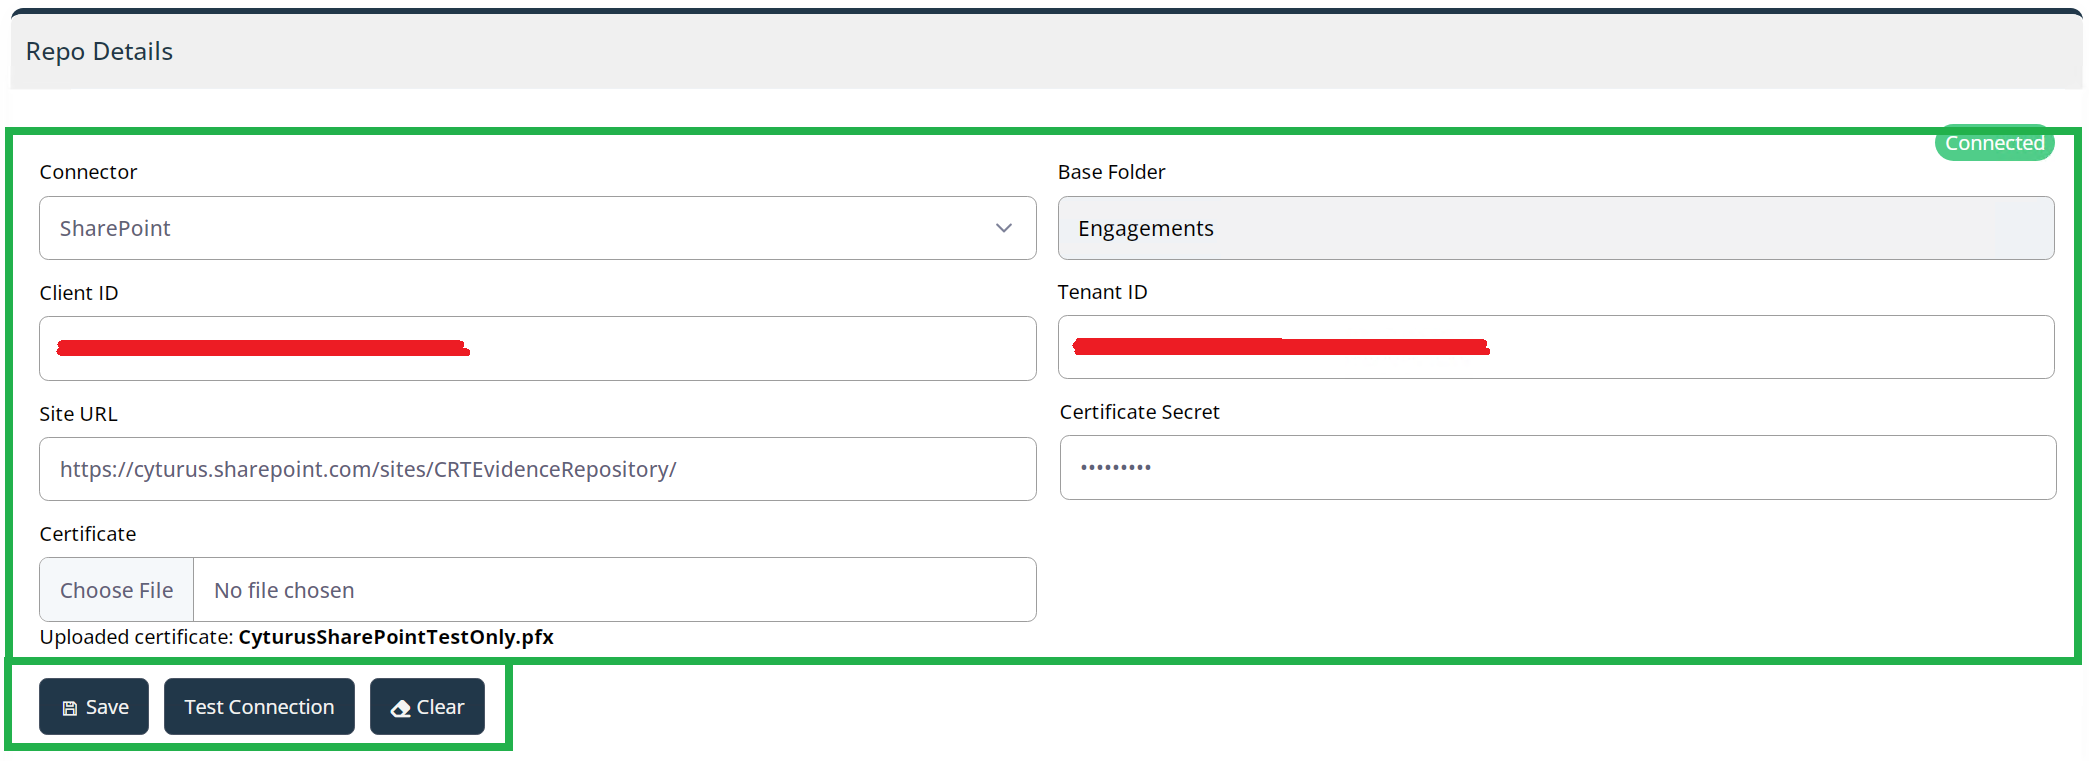
The parameters to fill are:
- Client ID: the Client ID of the application in Entra ID.
- Tenant ID: the Tenant ID of the application in Entra ID.
- Site URL: The URL of the SharePoint site in which you wish to utilize as your repository location.
- Certificate Secret: the certificate password.
- Certificate: the path to the PFX file of the self-signed certificate.
Follow the steps below to configure the Cyturus Application Suite to use Entra ID Application permissions to authenticate against SharePoint Online.
1) If you do not have a trusted certificate pair you must first create and configure a self-signed X.509 certificate
Firstly, copy and create a PowerShell script from the URL below and save it into a local folder with the name "Create-SelfSignedCertificate.ps1":
https://learn.microsoft.com/en-us/entra/identity-platform/howto-create-self-signed-certificate
To create the certificate, open a PowerShell command prompt (Run as Administrator) and execute the following command (you may set the start and end dates as you wish this is just an example):
.\Create-SelfSignedCertificate.ps1 -CommonName "MyCompanyName" -StartDate 2023-01-01 -EndDate 2024-01-01
As part of this process you will be asked to set a password to encrypt your private key, and both the .PFX file and .CER file will be exported to the current folder.
Keep the password and the path to the PFX file handy as you will need them later on.
2) Register the Microsoft Entra ID application in the tenant that is linked to your Microsoft 365 tenant
Once you have created your self-signed certificate, or you have a trusted pair you wish to utilize, you can then create the Entra application.
To do that, open the Azure Admin Center (https://portal.azure.com/) using the account of a user member of the Tenant Global Administrators group.- Click on the Microsoft Entra ID option:

- From the left-hand menu, select the option App registrations:

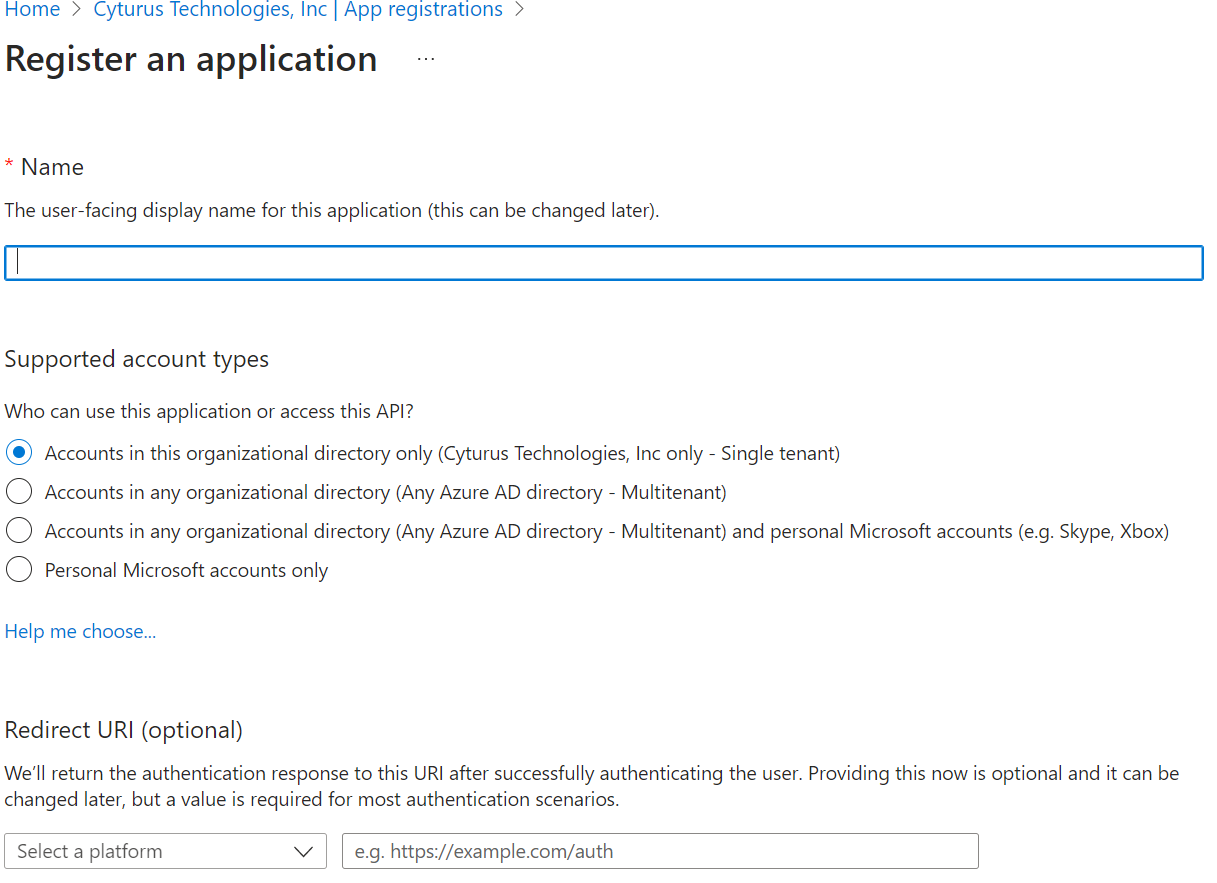
- Click the New registration button in the upper left part of the blade. Next, provide a name for your application, select Accounts in this organizational directory only, and click the Register button.


-
Commercial Cloud Tenants - The next three bullets are specific to Commercial Cloud tenants:
-
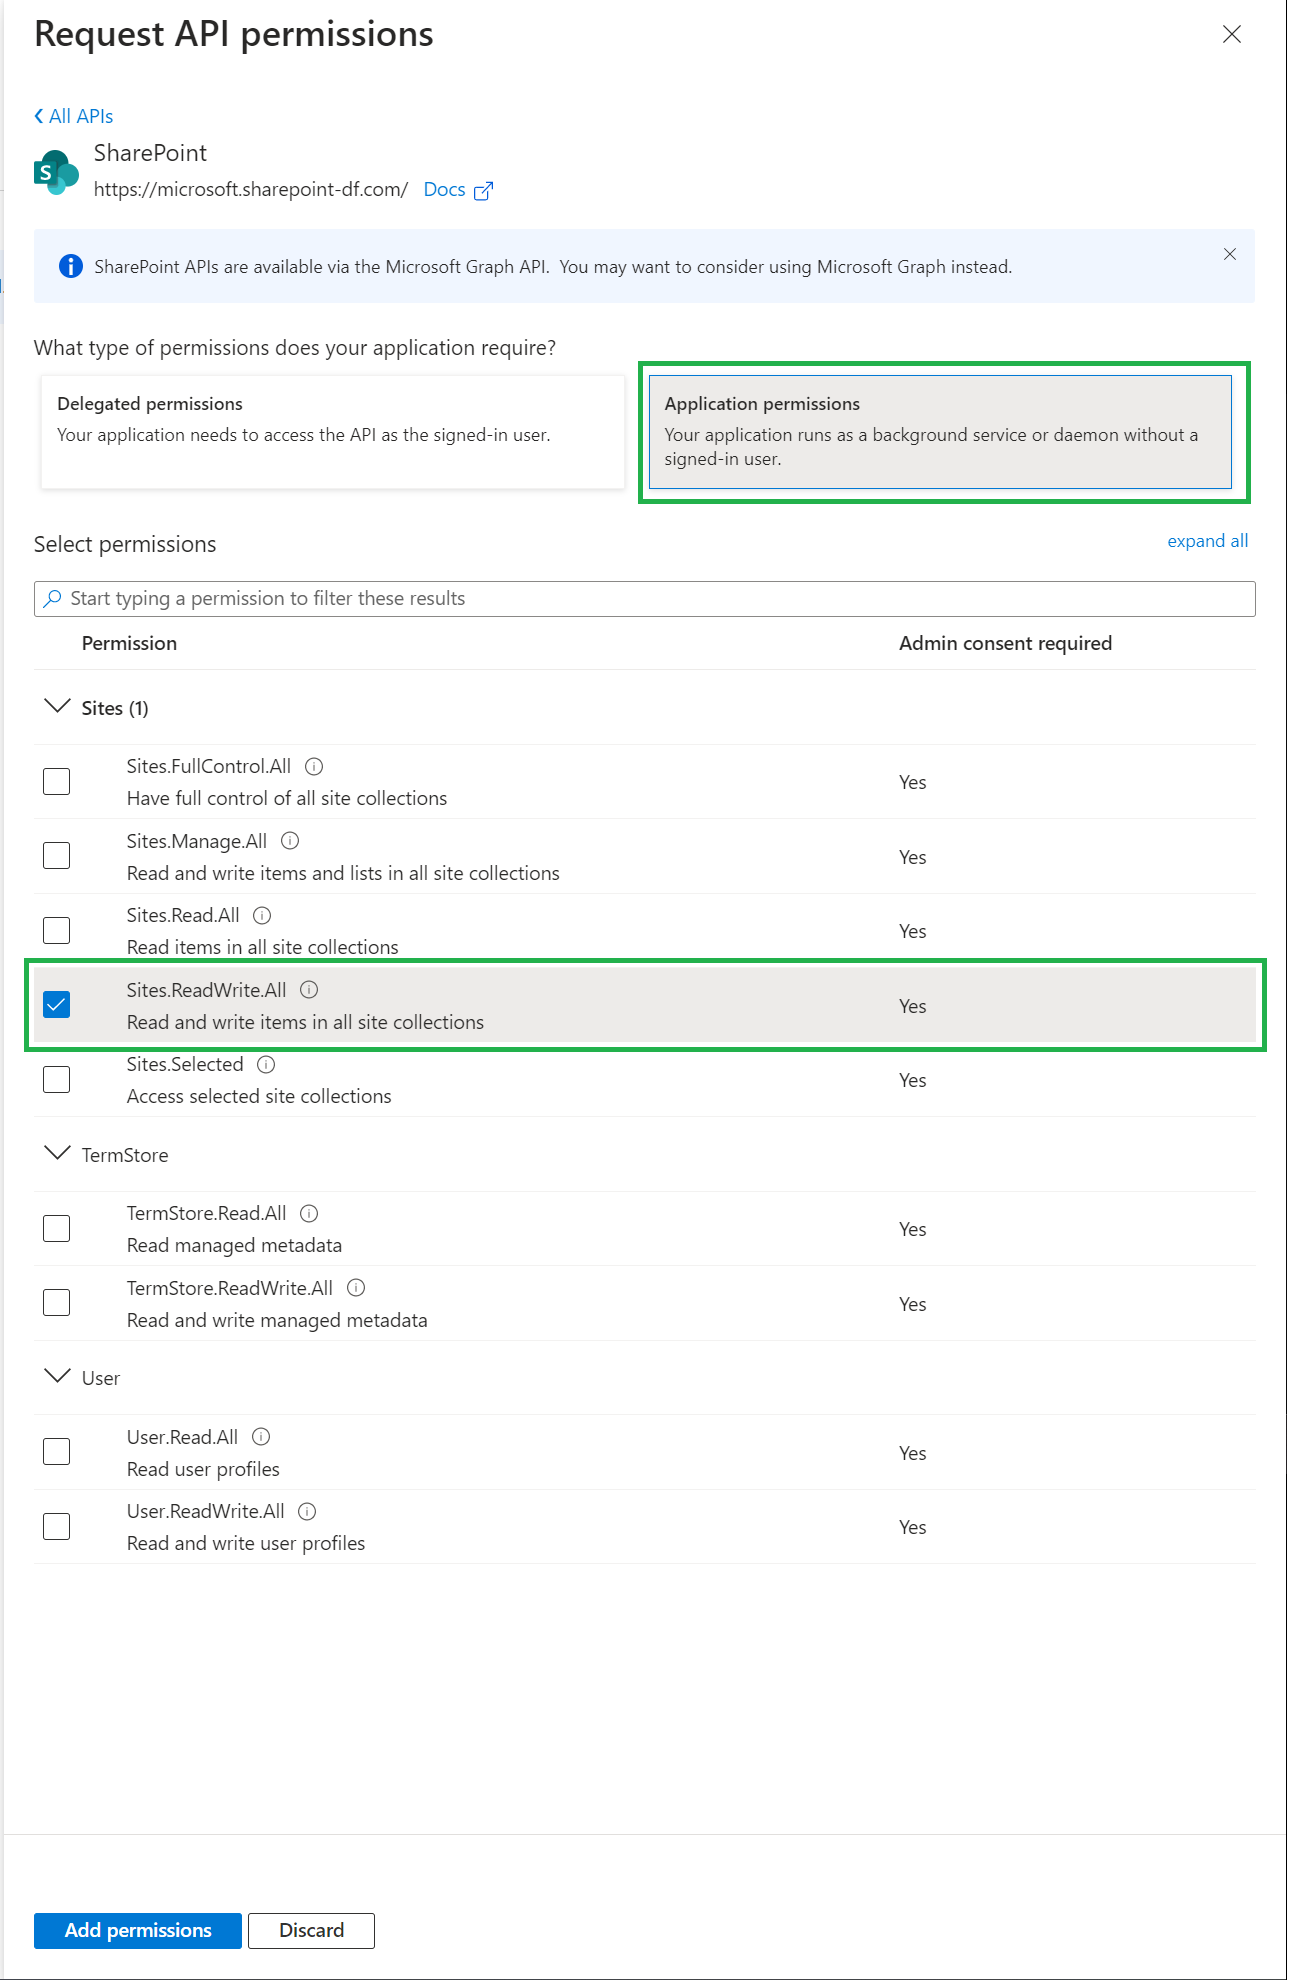
Now click on API permissions in the left menu bar, and click on the Add a permission button.From the choice of applications, select SharePoint:

-
Next, select Application Permissions and grant access to Sites.ReadWrite.All.Then click Add permissions.
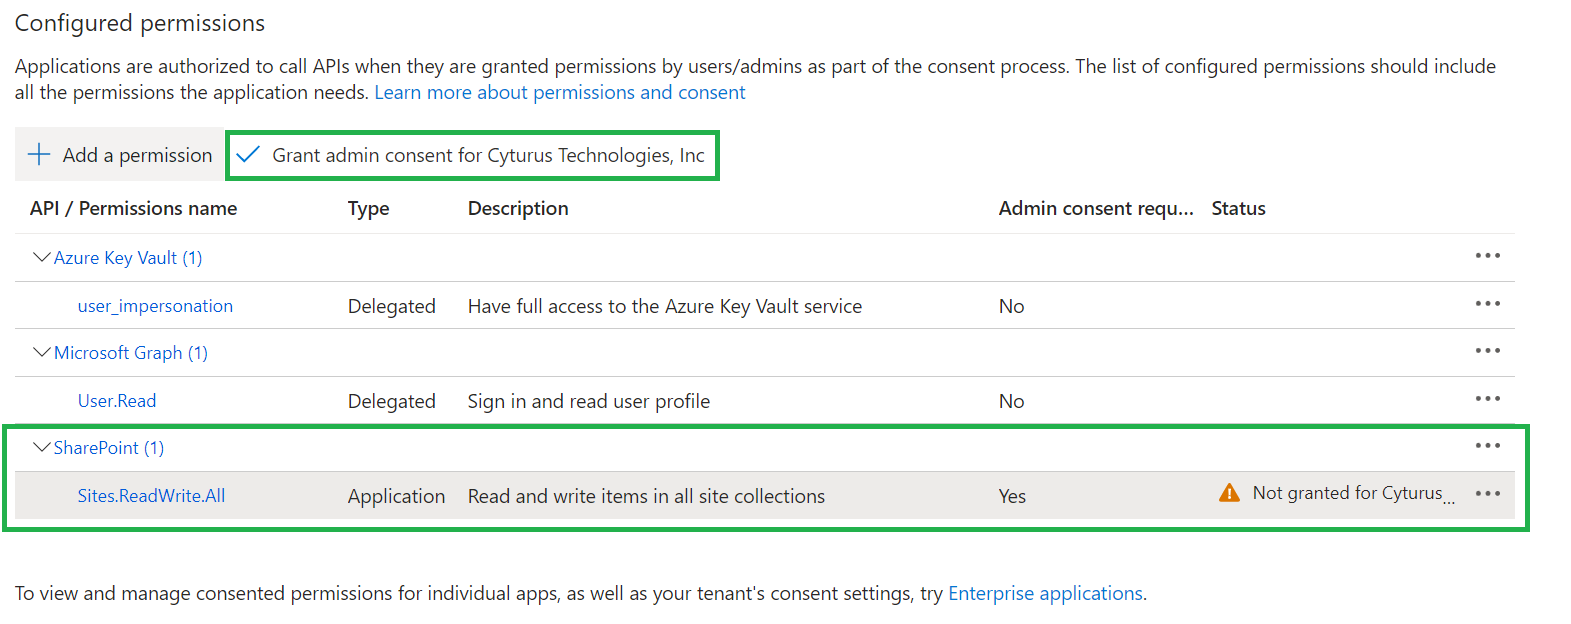
- Next, Click the Grant admin consent button followed by Yes, to grant consent to the application.
-
- GCC or GCC High Tenants - The next four bullets are specific to GCC or GCC High tenants:
-
Now click on API permissions in the left menu bar, and click on the Add a permission button.Under the "Select an API" section choose the APIs my organization uses option:

- Next, using the search/filter field - enter "Office 365 SharePoint" and select the Office 365 SharePoint Online application:

-
Next, select Application Permissions and grant access to Sites.ReadWrite.All.Then click Add permissions.

- Next, Click the Grant admin consent button followed by Yes, to grant consent to the application.

-
-
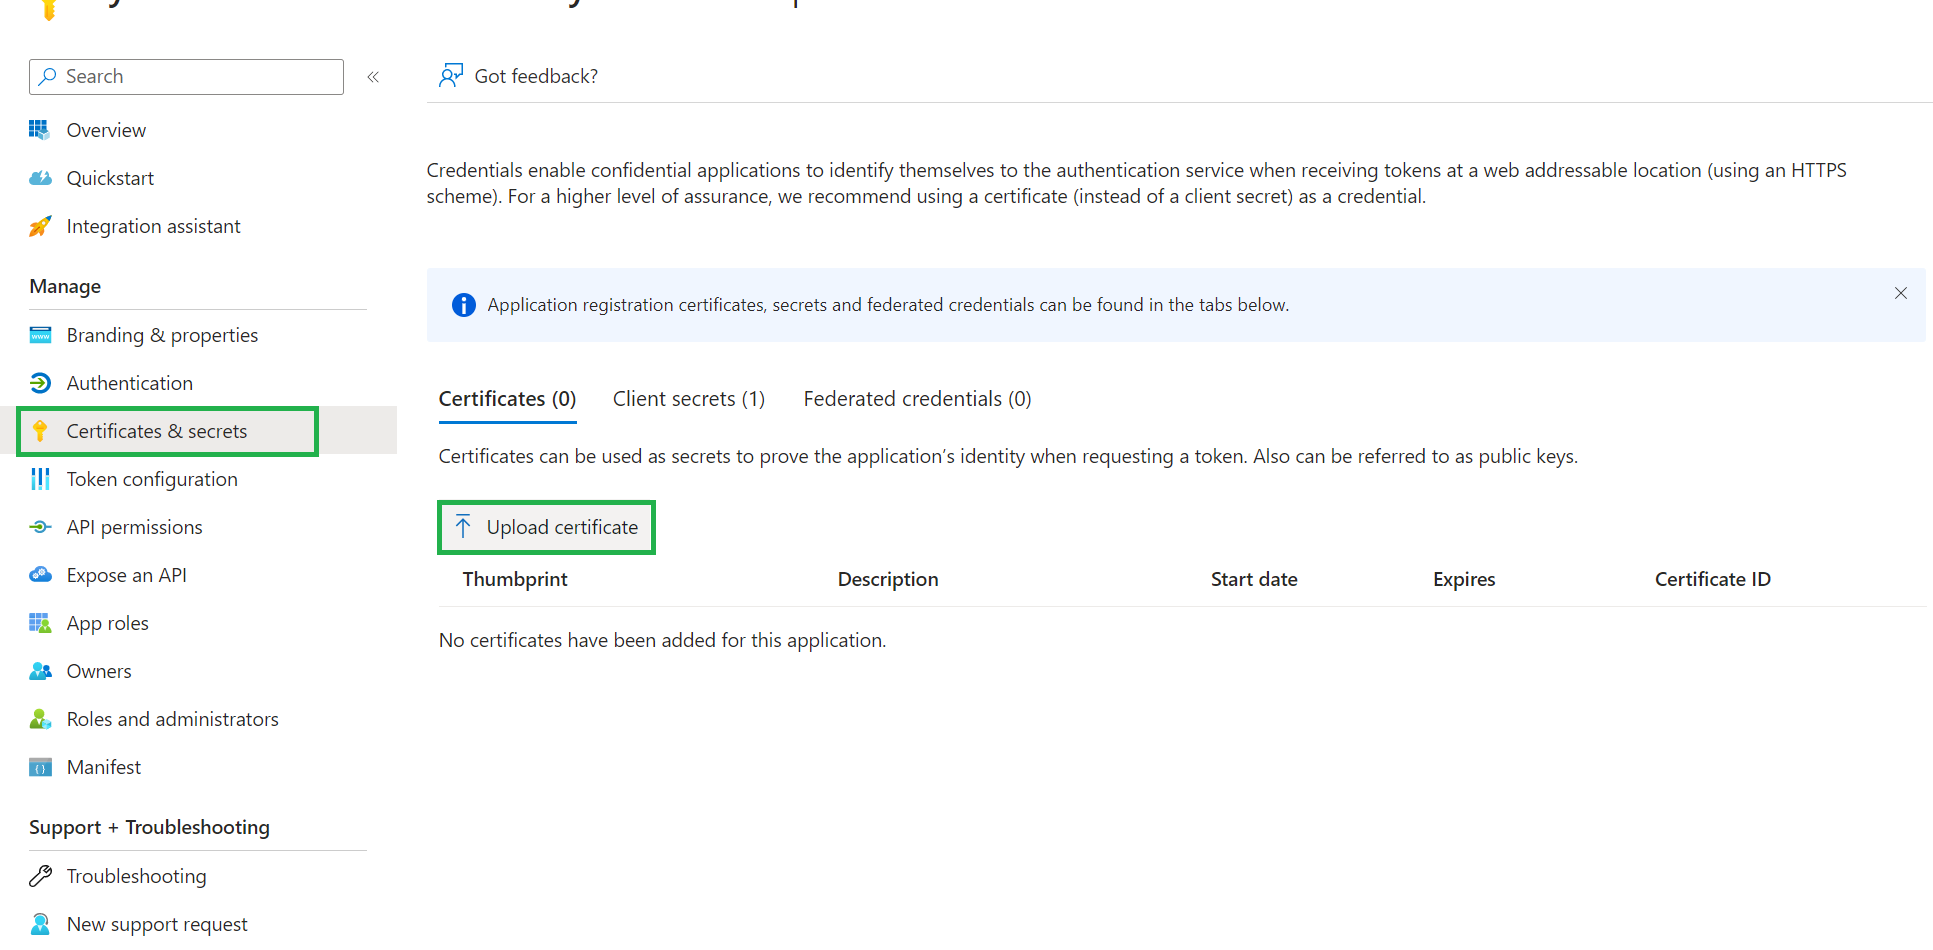
The next step is to pair the self-signed certificate with the application.On the left menu, select Certificates & secrets, followed by Upload certificate:
-
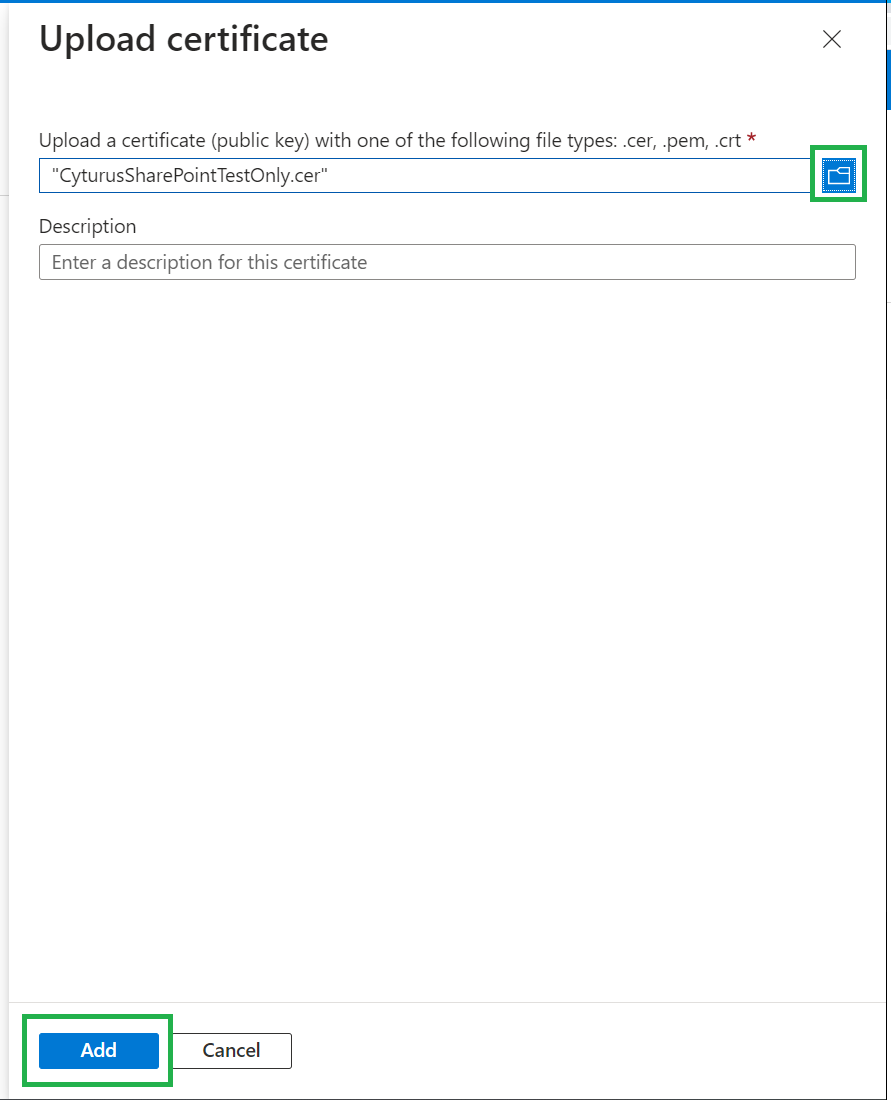
Select the .CER file you generated earlier and click on "Add" to upload it.
-
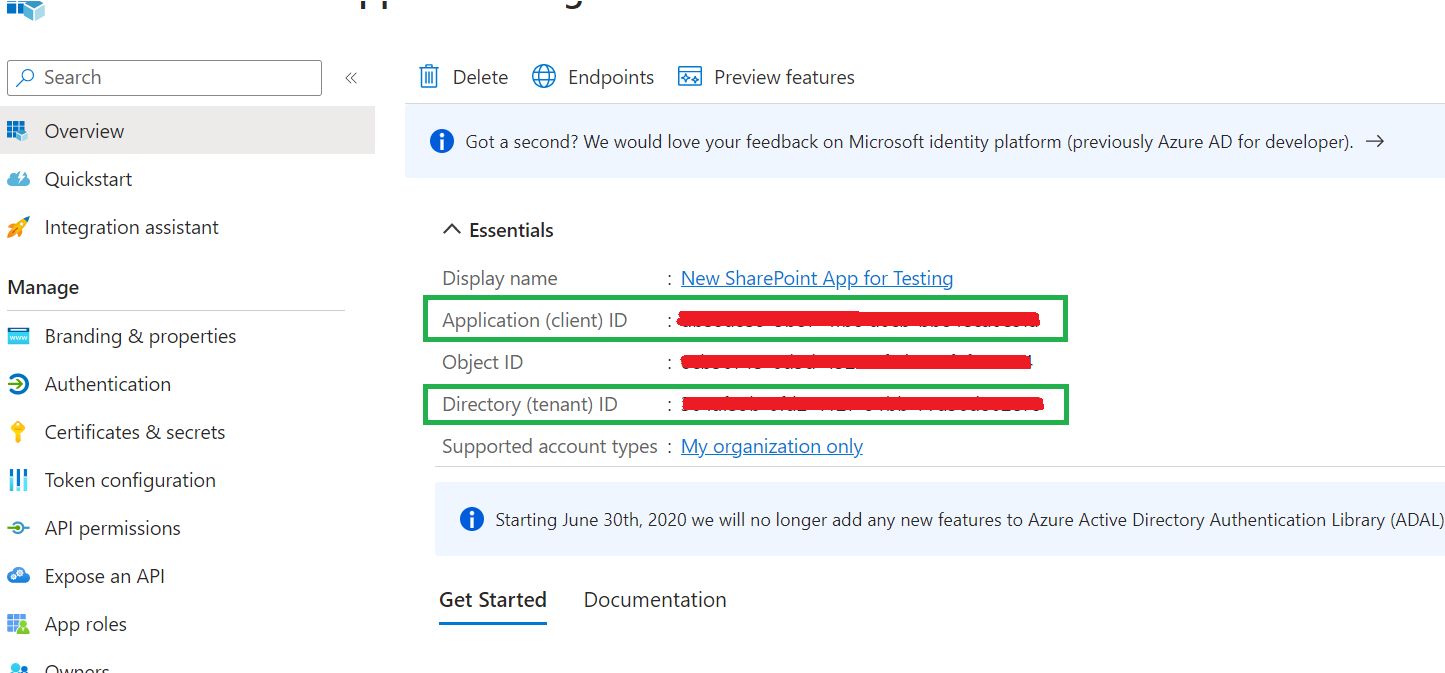
Lastly, select the Overview option and keep this page handy as you will need to copy and paste the Client ID and Tenant ID later on.
3) Configure the connection in the Cyturus Application Suite
Navigate to Administration > Manage Clients, select and edit the client you wish to work with, and then select the Repositories tab.Within the Repository tab select which module you wish to set the repository information for. Then, within the Repo Details section, select the Connector type of SharePoint and fill the following fields:- Client ID: copy and paste the Client ID from the application's Overview (see above);
- Tenant ID: copy and paste the Tenant ID from the application's Overview (see above);
- Site URL: enter the URL of the SharePoint site in which you wish to save your evidence into;
- Certificate Secret: enter the password you used earlier to create the certificate;
- Certificate path: enter the path to the .PFX file that was generated when you created the certificate.
Click the Save, and then Test Connection button to ensure the connection is successful.For further details about this type of authentication see this article:Reconfiguration
Should a time come where you need to reconfigure the repository information within the Cyturus application (change the Site URL, for example) you must also upload a certificate file.