
General Information
There are many different identity providers available (Microsoft Entra ID (formerly Azure Active Directory), Okta, etc.), and it is not feasible to document step-by-step instructions for every possible IdP configuration. This article is intended to provide a reference example of how a standard Microsoft Entra ID configuration can be implemented within the Cyturus application.
Prerequisites
To configure Entra ID integration with Cyturus, you will need to have the following already in place:
- An active Entra ID subscription, and a user account with one of the following roles: Global Administrator, or Application Administrator.
- A active Cyturus application subscription, and have a Cyturus user account with a primary security role (PSR) of "Instance Admin" (Instance Administrator), "Org Admin" (Organization Administrator), "Client Admin" (Client Administrator), or have the "Client Technical Admin" entitlement to complete the configuration.
Use Case
Cyturus natively supports Service Provider (SP) vs Identity Provider (IdP) initiated SSO. If you require an implementation using IdP initiated SSO, please contact Cyturus Support for more information.
Microsoft Entra ID - Enterprise Application Creation
Because each environment is unique, your configuration may vary based on your organization’s specific needs and requirements. As a result, we cannot provide exact, step-by-step instructions for how you must configure your Entra application to enable communication between Cyturus and your Azure tenant. Instead, the following section offers a baseline example of how to create the initial enterprise application required for Cyturus to communicate with your users.
Open the Azure Admin Center (https://portal.azure.com/) using the account of a user that is a member of the Global Administrators, or Application Administrators group:
- Search for, or click on the Microsoft Entra ID option:

- From the left-hand menu, select the option Enterprise applications from the main screen:

- Click the New application button in the upper left part of the Enterprise applications blade:

- Click the Create your own application button in the upper left part of the screen under Browse Microsoft Entra Gallery:

- Once you click the Create your own application button it will open a flyout window on the right side of the screen with a heading of Create your own application. Here you can name your application, and select how this application should integrate.
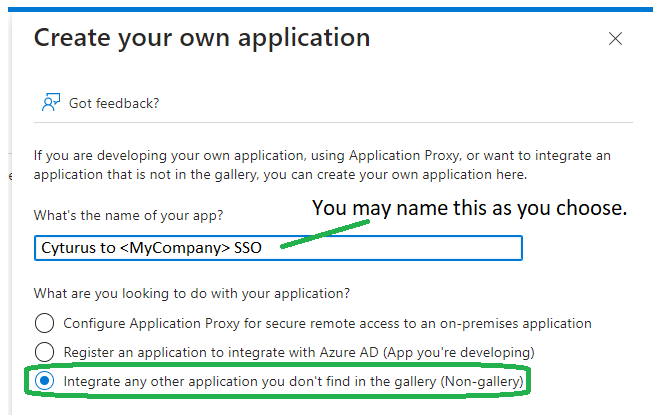
- When complete click the Create button at the bottom of the Create your own application flyout.
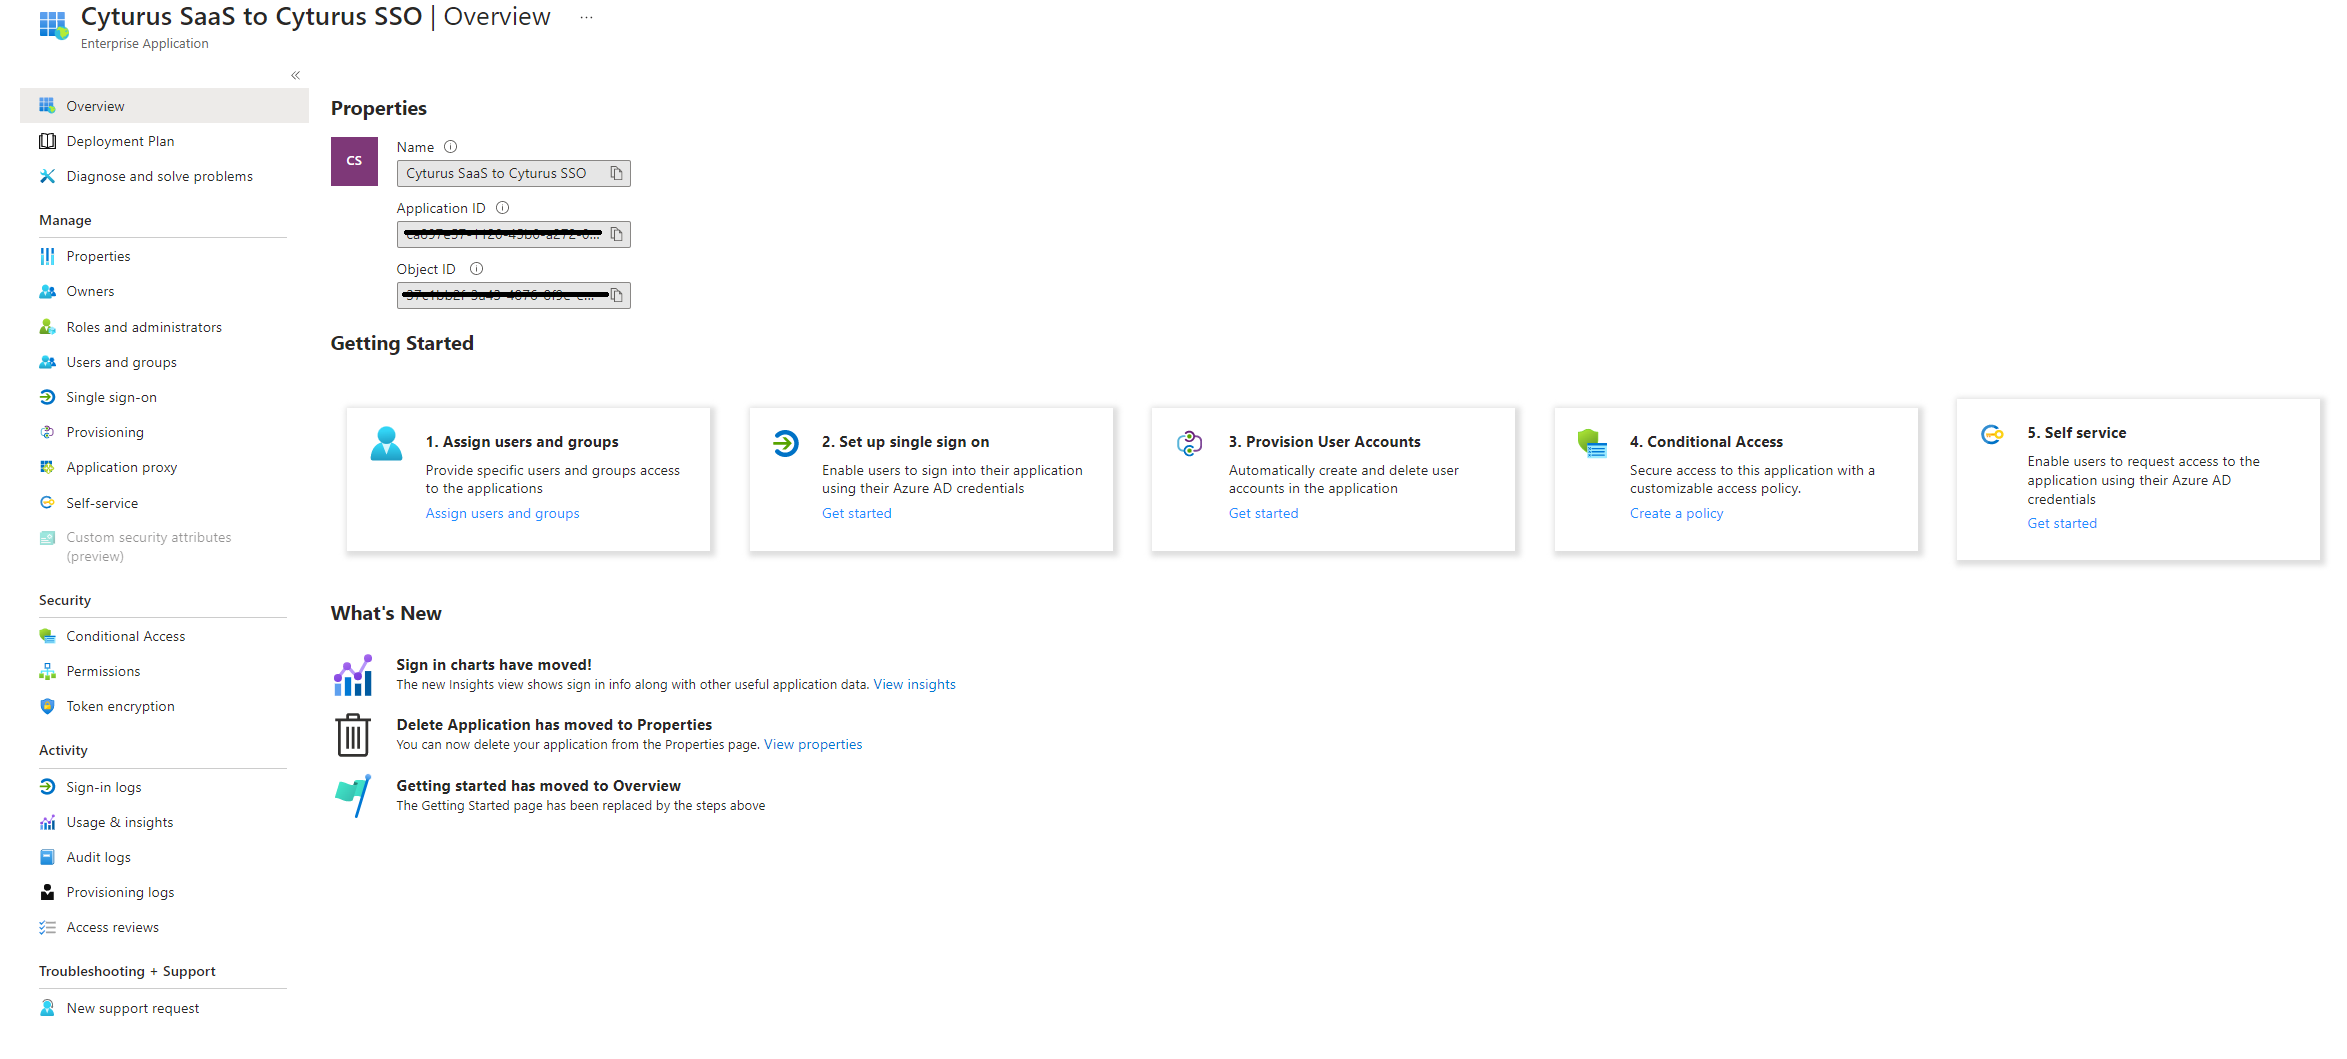
When the process completes you will be brought to the overview page of your newly created application. (Example shown.)
Microsoft Entra ID - Enterprise Application Configuration
The next steps will focus on configuring the application in preparation for setting up the configuration within the Cyturus application.
On the Enterprise application overview page there are steps under the Getting Started heading. We will focus on the following to minimally configure the application:
1. Assign users and groups, and
2. Set up single sign on
The remainder of the steps (3-5) will not be used for basic deployments.
Step 1: Assign users and groups
This step is where you will assign specific users and/or groups that are allowed to be utilized with this application. When you click the Manage > Users and Groups link it will take you to the Users and groups tab.
- To start, click Add user/group.

- You will be brought to the Add Assignment page where you will now need to either select the Users and groups that you with to assign, and/or the roles that will apply.

- Once you've went through the process of selecting users and/or groups, an Assign button will become active in the lower left corner of the window. Click Assign to assign those users and/or groups to the application.
Step 2: Set up single sign on
This step will have you setup the type of SSO being used, and present the needed configuration data that will be utilized when configuring the Cyturus application. When you click the Get started link from the overview page it will take you to the Single Sign-On tab.
- To start you will be asked to Select a single sign-on method. The option you want to click is SAML:
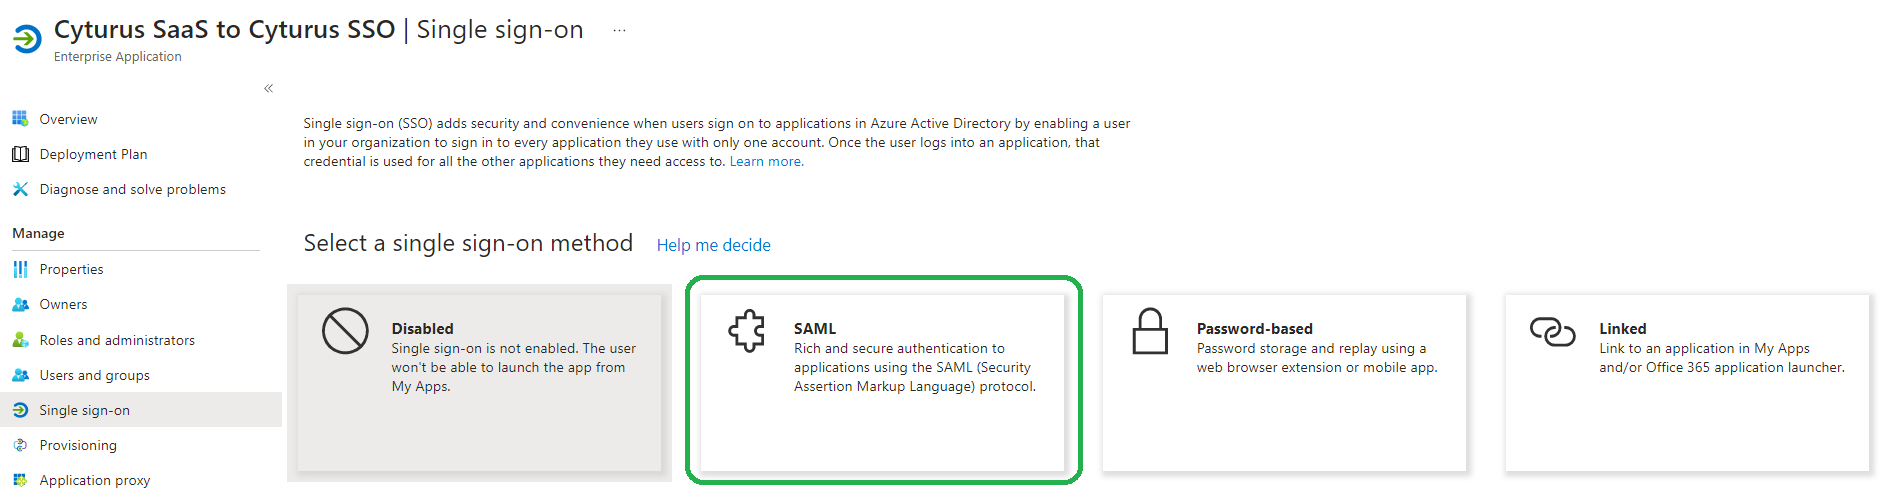
- Once you click the SAML button you will be taken to the following screen Set up Single Sign-On with SAML:

- At this point we will now need to setup the configuration within the Cyturus application to complete the configuration of Single Sign-On.
Cyturus - SAML Configuration Creation
Once the above steps have been completed we can move on to the necessary configuration within the Cyturus application.
- To start, as a Cyturus user with a product security role (PSR) of "Instance Admin", "Org Admin, or "Client Admin, or having the "Client Technical Admin" entitlement, log into the application.
- Navigate to Administration > Manage Clients.
- Find the specific client from the client list for which you will be configuring SAML.
- Click the pencil icon to edit the specific client.
- Once the Client Details screen appears take note of the Authentication Configuration tab and click it to access the SAML configuration settings for this client.
- Click the Add button to start adding a new IdP provider:
- Enter the Name of the provider. (Entra ID, OKTA, etc. - this is whatever you want to call it.)
- Upload a specific icon representing your provider, or whatever you wish.
- Click Save when completed.
- You should now have a configuration screen that looks similar to this:

- Click Save at this point to continue.
Cyturus / Entra ID - SAML Integration
Now that the basic configurations are complete between Entra ID and Cyturus we can integrate the two and test the configuration settings. There are two methods you can use to complete this step: Manual configuration, or utilize Metadata to setup the connection.
Manual Configuration:
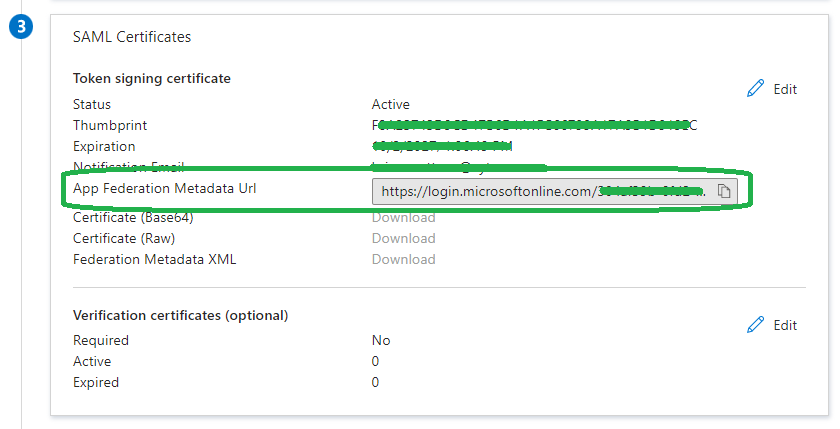
- First, within the Entra Enterprise application we will need to go to the area named SAML Certificates and copy the value from the field labeled App Federation Metadata Url.
- Then, within the SAML Configuration screen in the Cyturus application, we will paste that value in the Metadata URL field and click the Upload Metadata button. Once clicked it will process for a moment, and then populate the remainder of the fields within the SAML Configuration screen. Here is where we need to take note of two specific fields as those will be needed in the next step:

- Entity ID
- SAML Response Url
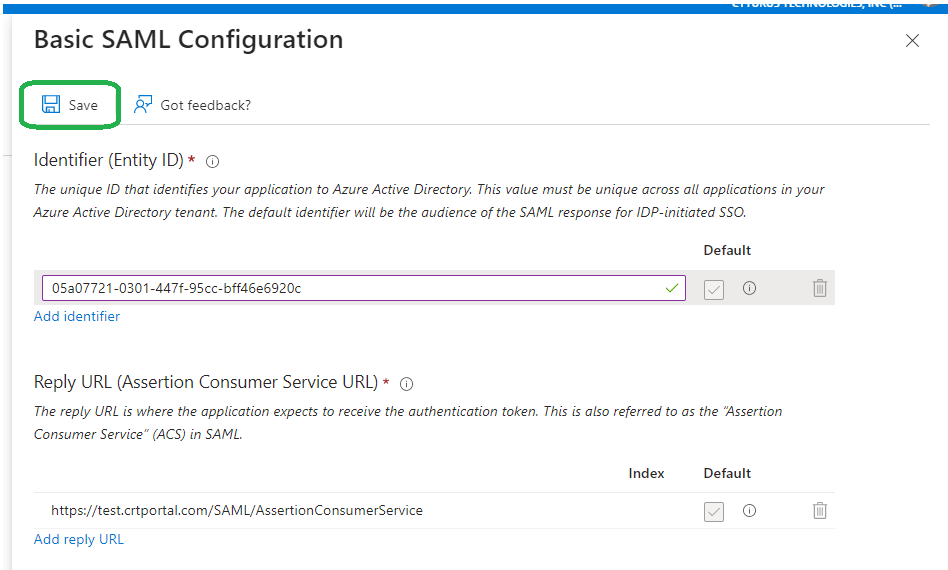
- Going back to the Entra Enterprise application we will now need to look at the area named Basic SAML Configuration. Note there are two items shown as Required. We will need to click the Edit button within the Basic SAML Configuration step which will bring up a Basic SAML Configuration flyout on the right side of the screen.
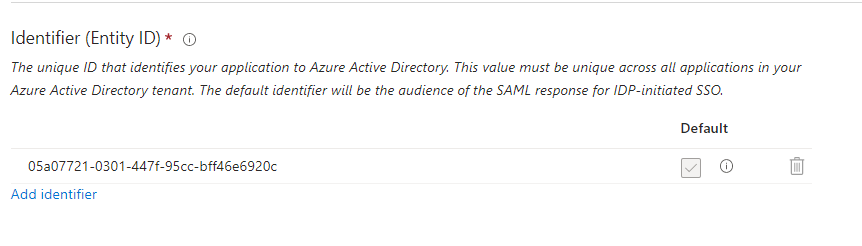
- From here we will want to click the Add Identifier link.

- We need to enter the Entity ID value from Cyturus into the field shown.
- Next we need to click the Add reply URL link.
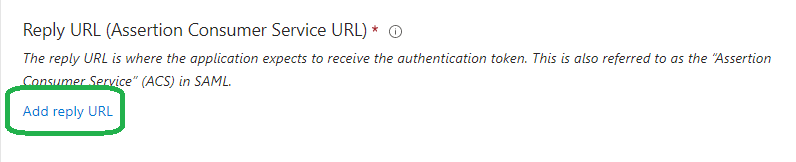
- We need to enter the SAML Response Url value from Cyturus into the field shown.
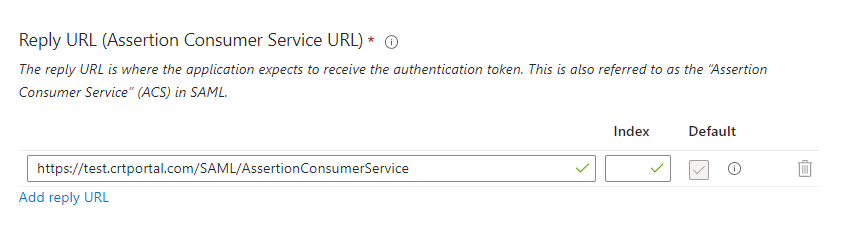
- Once those values are entered the Save button will become available. Click Save to close the flyout.
- From here we will want to click the Add Identifier link.
Please note that any example values used within the above document are for the purposes of documentation only and are not going to be the same as what will be used in your environment.
Cyturus - Assigning users to SAML Configurations
Cyturus has the flexibility to allow users to utilize local authentication methods for their users, or multiple flavors of IdP's that clients may employ. For this reason SAML configurations are not automatically applied to all users attached to a single client.